In this technologically advanced world, unlocking the mystery of our smartphone is a piece of cake. Besides this, many tech enthusiasts use modified user interfaces by installing custom ROMs and customizable firmware. If you also want to attain those superpowers, our guide to Install TWRP recovery on any Android phone will thoroughly help you.
There are a handful of people who want to modify the user interface, add more security layering, and enhance the performance of their standard Android phone. However, the whole process could be quite complex and tedious if you didn’t have information regarding the correct procedures, tools, and guides.
Installing a custom recovery is one of the core steps that will properly assist you in getting root access with ease. Therefore, it’s necessary to understand the process of flashing TWRP on your Android device, now let’s get started!
How to Install TWRP Recovery on Any Android Phone?
Generally, if you want to install any custom software or ROMs, it’s mandatory to have a custom recovery like TWRP. The reason for that is you can’t install custom kernels with the stock recovery. But it’s a completely different story when you start unlocking the system settings as per your wish.
However, it’s essential to note that many people are using the wrong method to install this custom recovery. Hopefully, we covered prerequisites in the following part so that you can effortlessly flash TWRP custom recovery without hassle.
Requirements
- First and foremost, you will need a complete Android backup.
- A PC and USB cable are a must so that you can connect your device.
- Download and install the fastboot drivers, tools, and software.
- Following this, it’s important to unlock the bootloader settings.
- The users are required to download TWRP recovery as per their phone model.
Note: Usually, you will find the official recovery from the TWRP website. Yet at the same time, you might have to download the unofficial TWRP recovery version if you didn’t find your smartphone model number or name on the official site.
On the other hand, if you are struggling to find the correct TWRP file, then visit the XDA forum so that you can download the unofficial version with no problem. Alongside this, it would be great if you would do the subsequent part properly since you have to follow a tedious installation process of multiple resources.
Warning: Install custom ROMs and rooting devices will violate the warranty of your Android smartphone. In addition to that, the users might brick their devices during the process. So, it’s the responsibility of the users to follow the guide precisely and avoid mistakes.
Method 1: Install TWRP using a PC
Everything depends on whether you have already unlocked the bootloader mode or not. If yes, then you can follow the given instructions. Following this, the users will also require a computer and cable to connect both devices.
Step 1: Install Platform Tool and ADB driver
During the upcoming process, you will need SDK Android Platform tools so that you can efficiently run the command prompt. Aside from getting this tool, it’s also suggested to download and install the ADB driver to avoid any errors during the installation process.
Step 2: Enter into Fastboot Mode
After completing the bootloader access process, you need to move your focus toward putting your phone into the fastboot mode. Every brand has its unique procedure for entering this booting mode. Usually, it’s just a Power Up + Power button.
However, depending on the brand the process could be completely different. Therefore, we advise you to confirm the method to put your Android device into fastboot on the internet.
- Long press the Power button to switch off your device.
- Now, press the Volume Up + Power button to boot into fastboot.
Step 3: Connect Device and Run command prompt
After you have found the correct fastboot process for your phone, it’s recommended to link your phone to the PC. You will connect both devices using the USB cable. Once done, you have already finished half of the procedure, the rest of the installation is ahead.
Before you get started make sure to fetch the TWRP file, if you haven’t downloaded it yet. Next, you have to follow the subsequent instructions.
- Download and extract the platform tools zip.
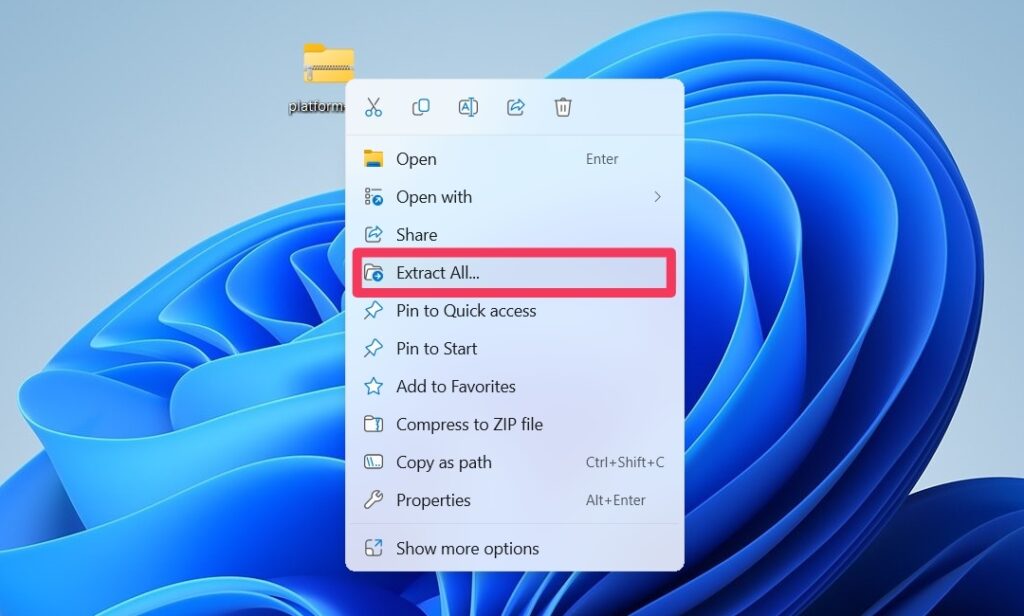
- Open the platform tools folder on the PC screen.
- Next, type “cmd” in the address bar and press Enter.
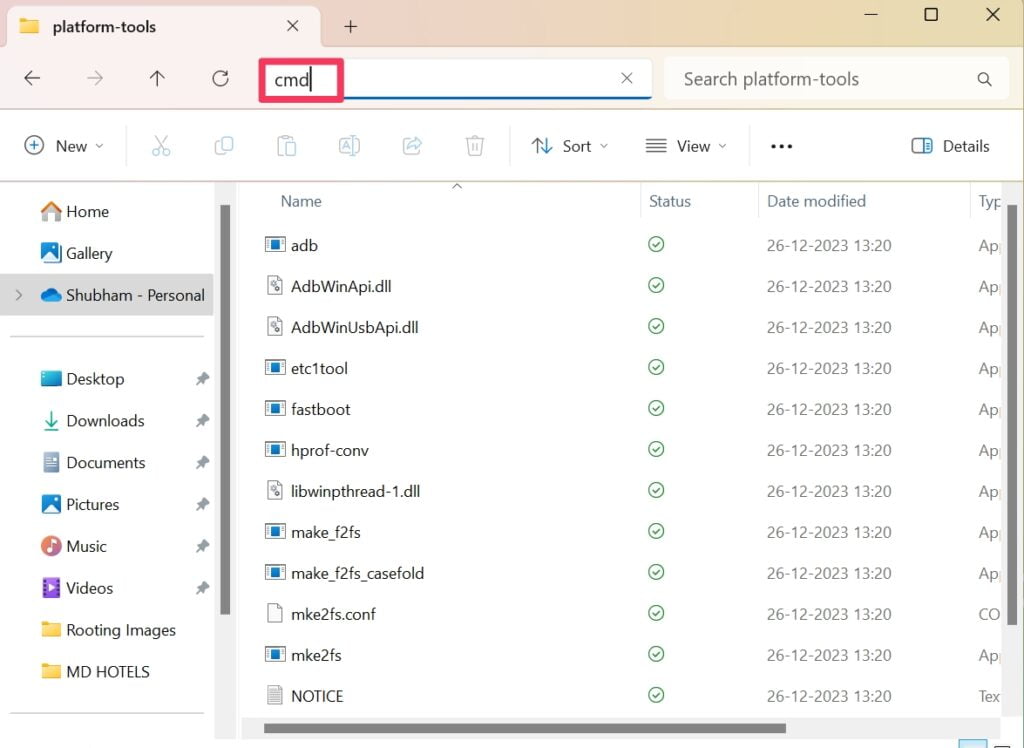
- With this, the command prompt will appear on the screen.
Step 4: Apply Fastboot Commands
From here onwards, you have to type commands inside the prompt so that you can easily install TWRP recovery on any Android phone. Now, let’s have a look at those commands.
Type “fastboot devices” and hit Enter
With this command, the users will notice whether their device is connected to computer. If you see a combination of alphabet and numbers, then you don’t have to worry. If not, it will require you to reconnect your device to the PC.
Type “fastboot flash recovery twrp.img” and press enter
Here, you will replace “twrp.img” name with your smartphone’s TWRP file name. On the other hand, you can simply drag and drop the TWRP file after typing “fastboot flash recovery”.
Type “fastboot reboot recovery” and click on enter
From the above commands, the users will access the TWRP recovery homepage. Once done with the flashing process, you can effortlessly install ROMs and other third-party software.
Method 2: Install TWRP without PC
For this process, the users will require a secondary phone with OTG support. Next, you have to download and install the Bugjaeger App on the secondary phone, download the TWRP file of the primary phone, and enable OEM unlocking and USB debugging from developer mode.
Following this, you have to connect the OTG adapter to the charging cable. Plus, Boot Your primary device into fastboot. Next, you have to connect both devices using an OTG adapter and USB cable. Once done with all of this tedious work, let’s get into
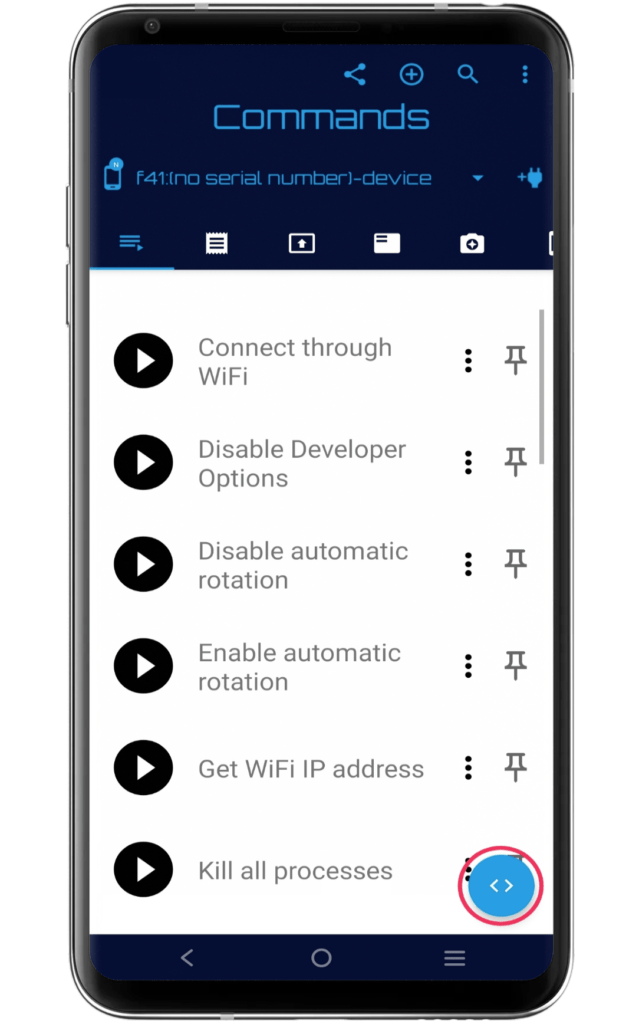
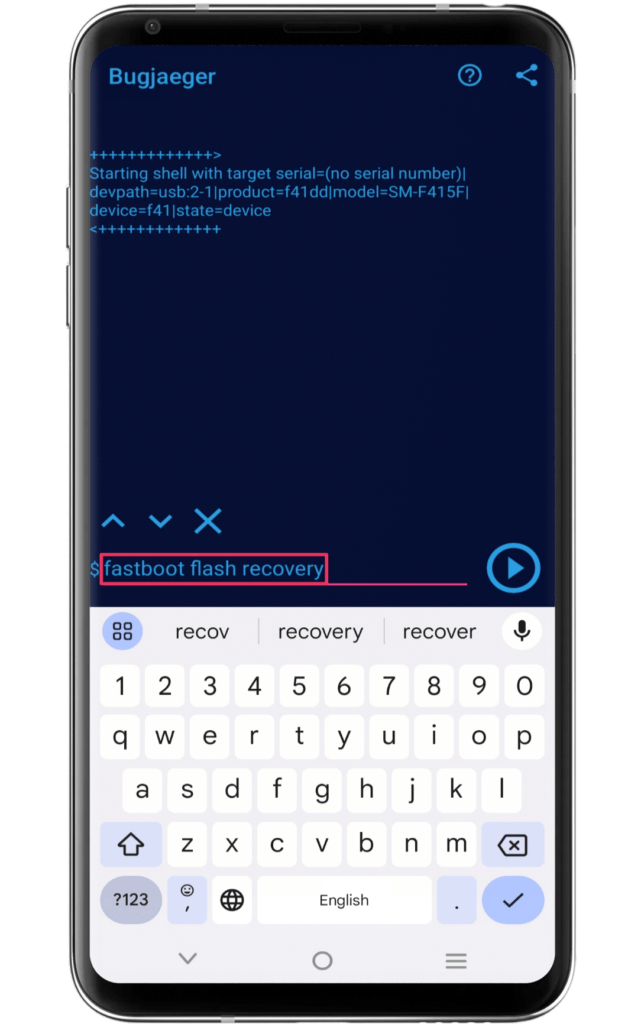
- Open the Bugjaeger App and click on the “blue” command button.
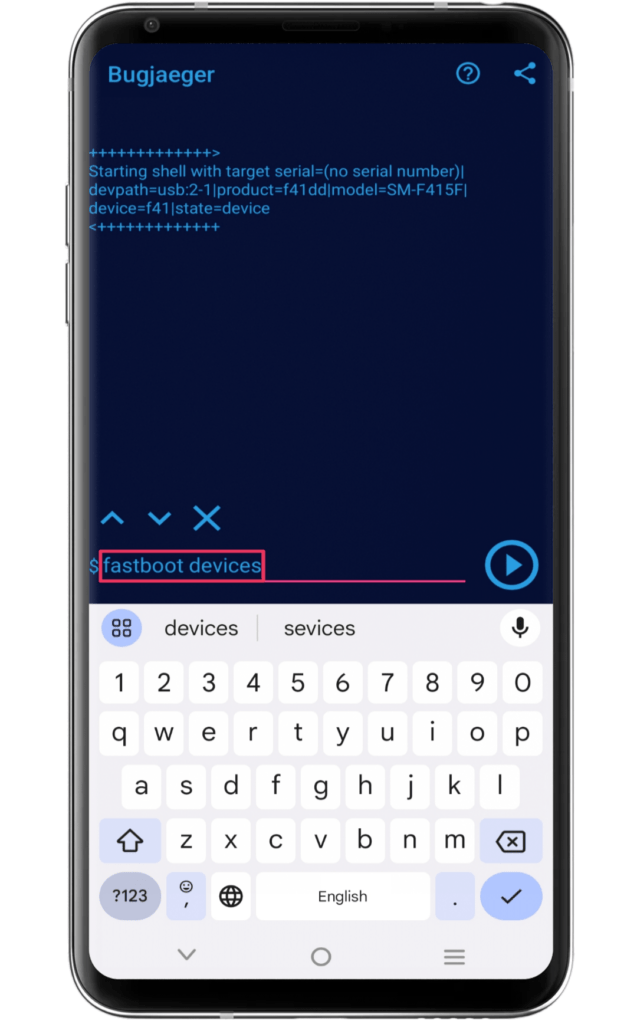
- Type “fastboot devices” and press enter to verify the device connection.
- Type “fastboot flash recovery” and press space.
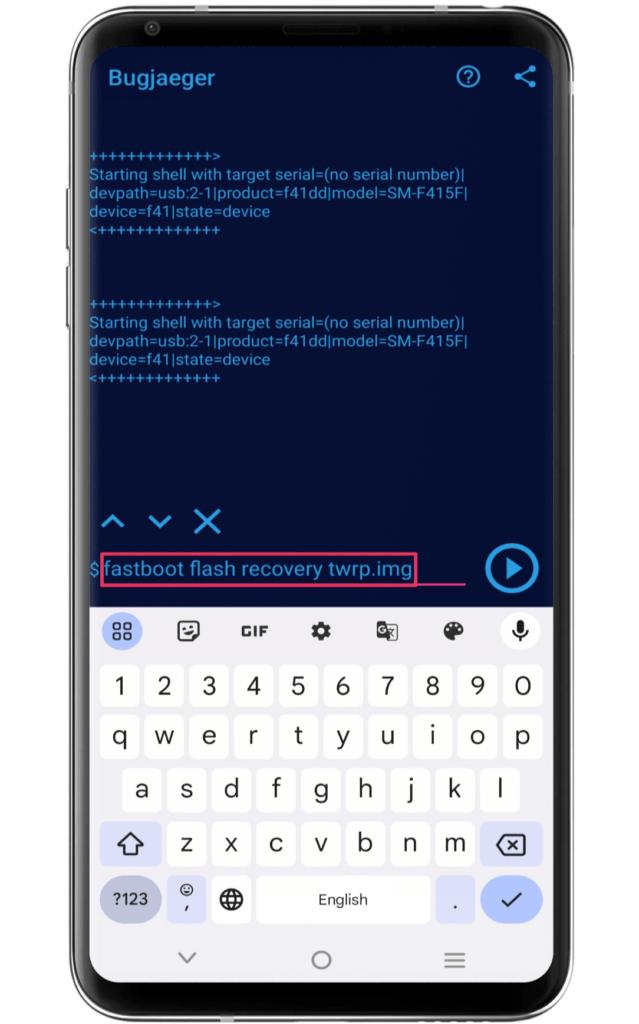
- Now, click on the Add file button and select the TWRP file.
- The command should look like “fastboot flash recovery twrp.img”.
- Press play button to initiate the TWRP recovery flashing process.
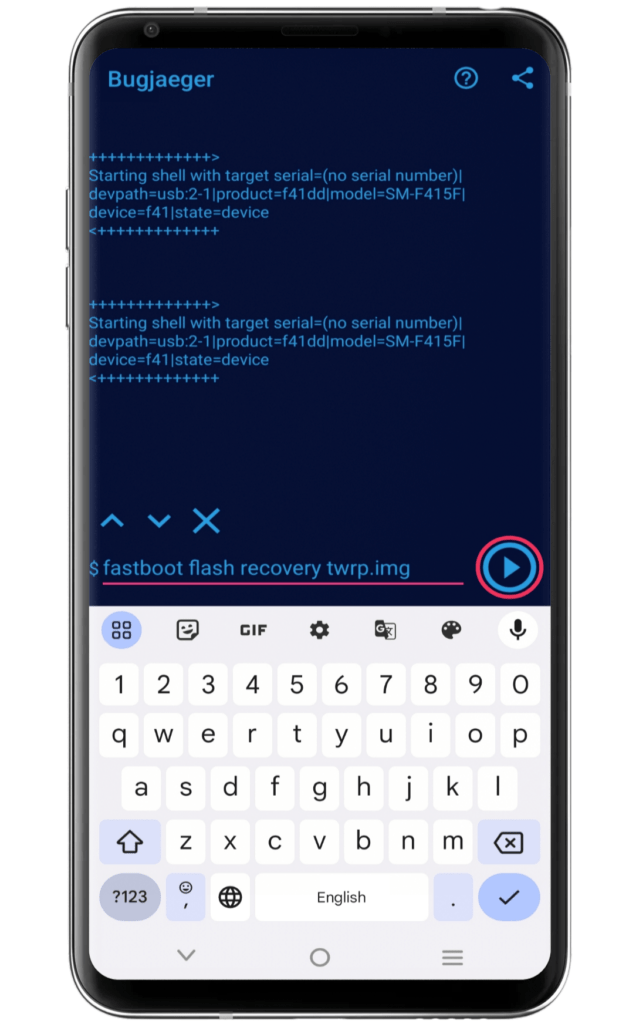
- Finally, boot your device into recovery mode to enjoy customization!
Final Thoughts:
From the above guide, everyone can easily install TWRP recovery on any Android phone and unlock various customization tools. Furthermore, the readers can take the next step and gain root access with no worries.
With each smartphone brand, the process of installing TWRP recovery or any other custom recovery will be varied. Here, we only provided the general steps that are covered in most Android phones. Therefore, if you have doubts, visit the comment section.