Are you looking for a safe method to Root Redmi Note 13 Pro? If you want to achieve that system access, you need to grasp the whole rooting process. From this guide, you will get the necessary tools, apps, and software to get started with the entire process.
There’s no doubt that Redmi phones will bring immersive customization privileges. Yet, if you desire to unlock the true potential of your phone, the following post will efficiently provide a roadmap. With that said, let’s dive into the guide.
How to Root Redmi Note 13 Pro?
Multiple methods will provide root access using malicious tricks. But, the most common & safest method includes the magisk flashing. Get the entire procedure info to systemically gain root access to your Xiaomi device!
Basic Requirements
Before you dive into the journey of gaining root access, it would be great if you cleared the primary things such as downloading essential tools, unlocking system settings, and many more. Don’t panic! We listed everything that you need to know below!
- Before proceeding with the guide, take a complete Android phone backup.
- Download the necessary tools and software on your phone and PC.
- Ensure that you have already unlocked the bootloader.
- Download ADB/Fastboot Driver and SDK Platform Tools.
- A PC and USB cable will be required for connecting your device.
- Get the latest version of the Magisk App for your phone.
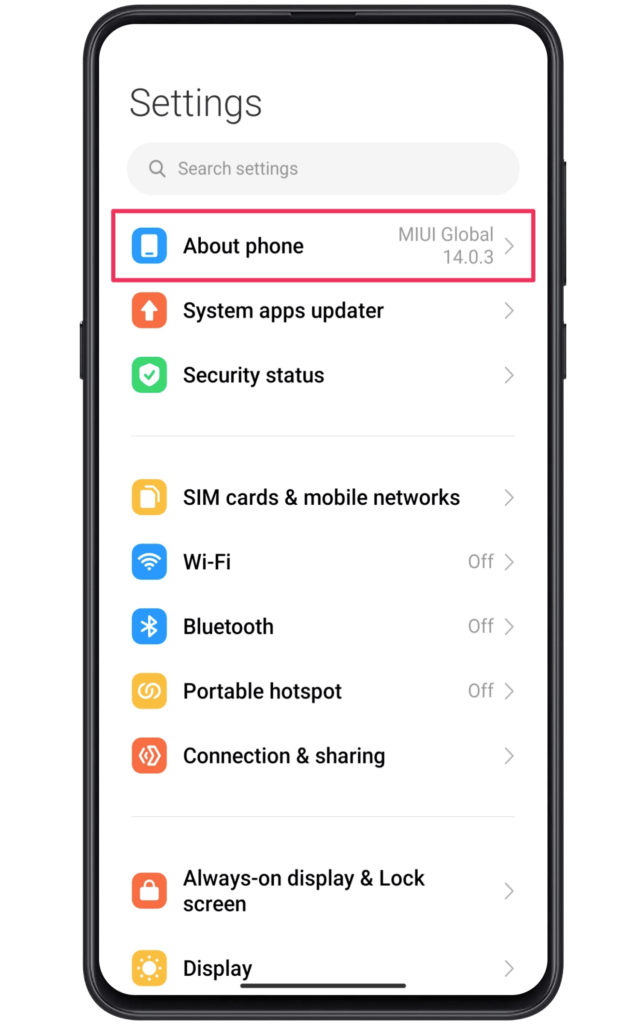
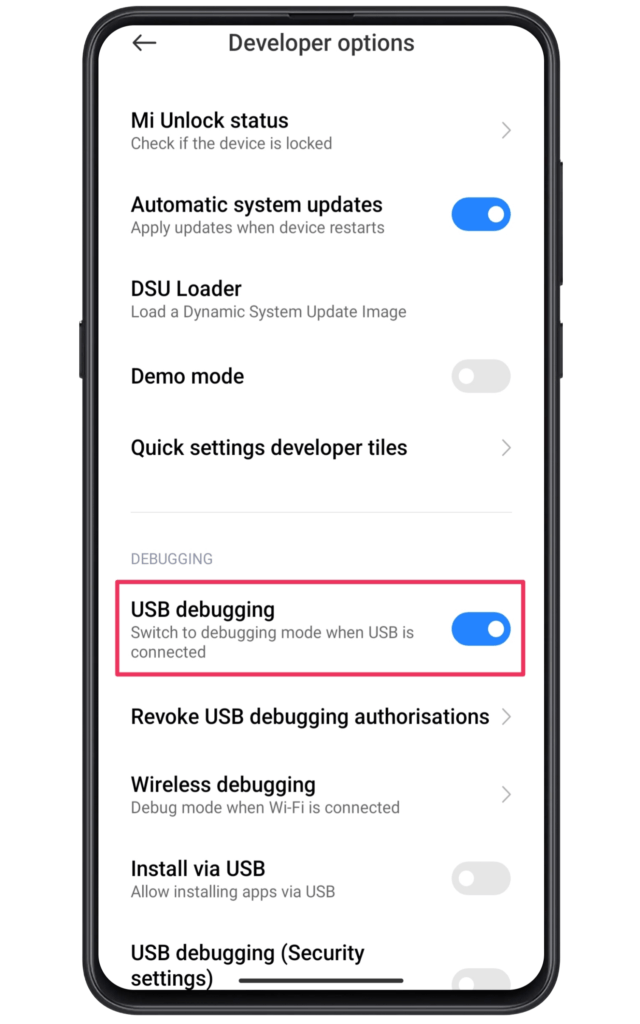
Step 1: Enable Developer Options
Here is the process to enter the developer settings of the Redmi Note 13 Pro.
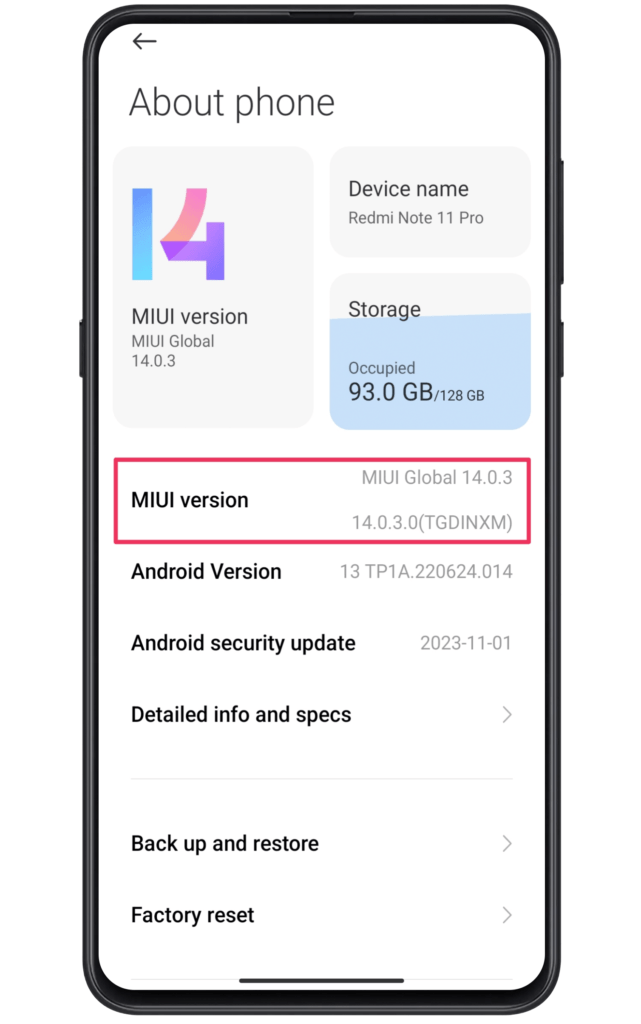
- Open the Settings App and select About Phone.
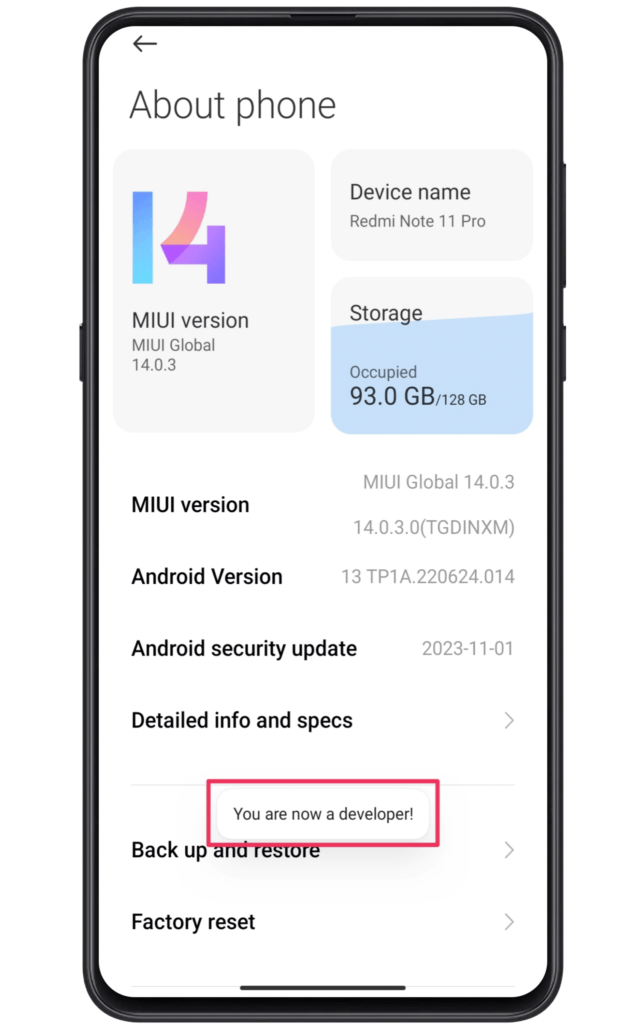
- Now, click on the MIUI version more than five times.
- Wait till the message “You are now a developer !” appears.
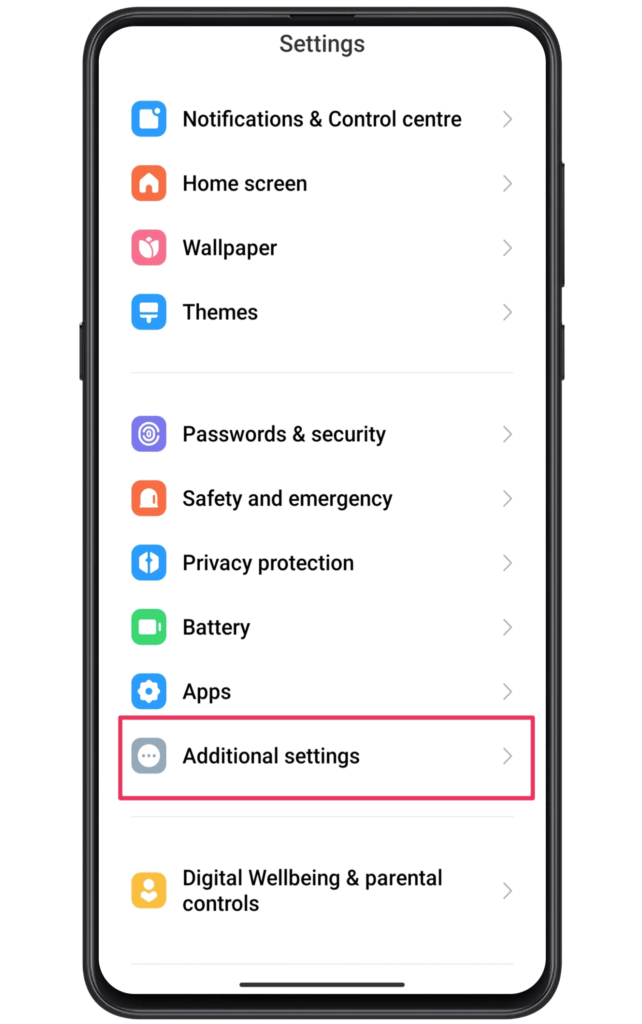
- Next, head toward the additional settings and select developer options.
- Lastly, enable USB debugging and OEM unlocking toggles.
Step 2: Unlock the Bootloader Settings
The next part will require an MI unlock tool, which will assist in unlocking the bootloader. In general, the bootloader settings are locked by default, while it’s possible to access those system settings. But for a Redmi phone, you need to enable MI Unlock status.
To unlock this status, the readers need to download the MI Unlock tool with Xiaomi phone’s drivers. Once done, install the tool, sign in with your account, and boot the smartphone into fastboot to gain bootloader access. We would refer you to check out the unlock bootloader guide to make this process easier.
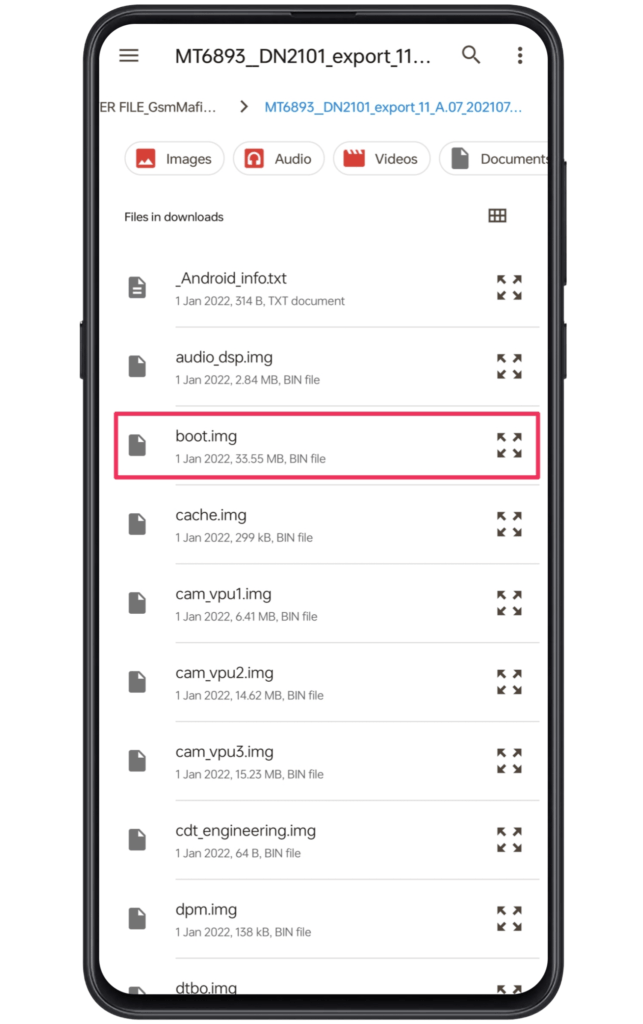
Step 3: Get the Xiaomi Firmware File
Now, you need to find the appropriate version of the Redmi Note 13 Pro firmware file. For this, visit the Mi Firmware website and download the file. To download the correct version, we recommend checking the MIUI version of your device.
- Open the Settings App and Click on About Phone.
- Write down the MIUI version of your device.
- Now, search your Redmi phone on the Mi Firmware Website.
- Finally, download the correct MIUI firmware file on your laptop/PC.
From here onwards, you need to extract Redmi Note 13 Pro firmware using the preferred unzip tool. Once the files are extracted, open the firmware folder → select the image folder → transfer the “boot” file to your phone.
Step 4: Patch Magisk File
In this section, the users are required to download and install the magisk software on their phones. Magisk is the safest rooting solution available on the internet. In addition, it’s the most reliable option for the newbies and pros. So, let’s dive into the process of creating a patched magisk file.
- First, launch the Magisk app on your phone.
- Click on the Install button and tap on the “select patch file” option.
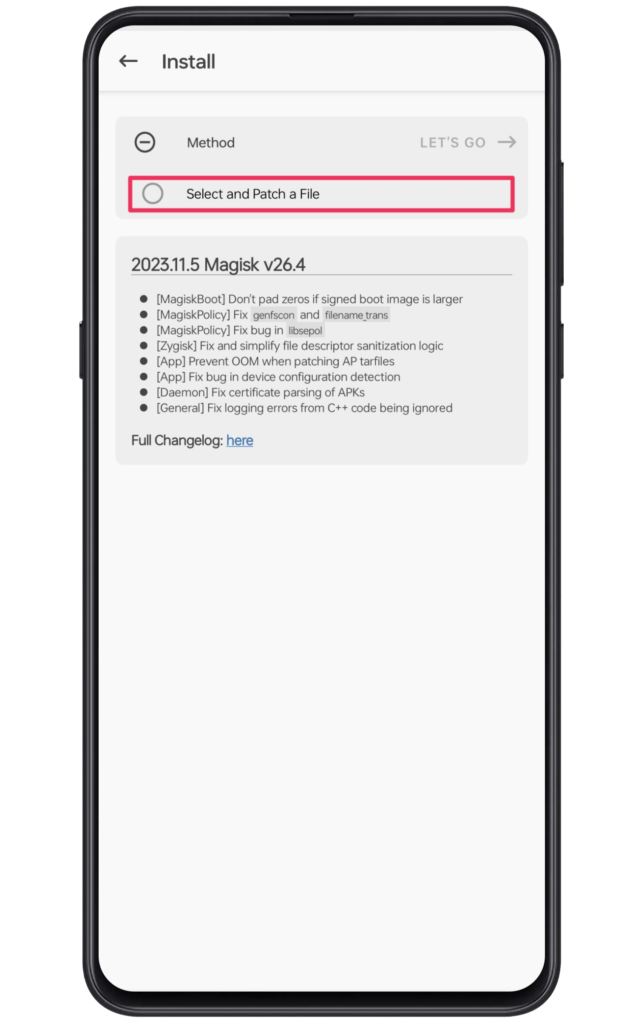
- Next, head toward the boot file location inside the internal storage.
- Following this, select the file and initiate the patching process.
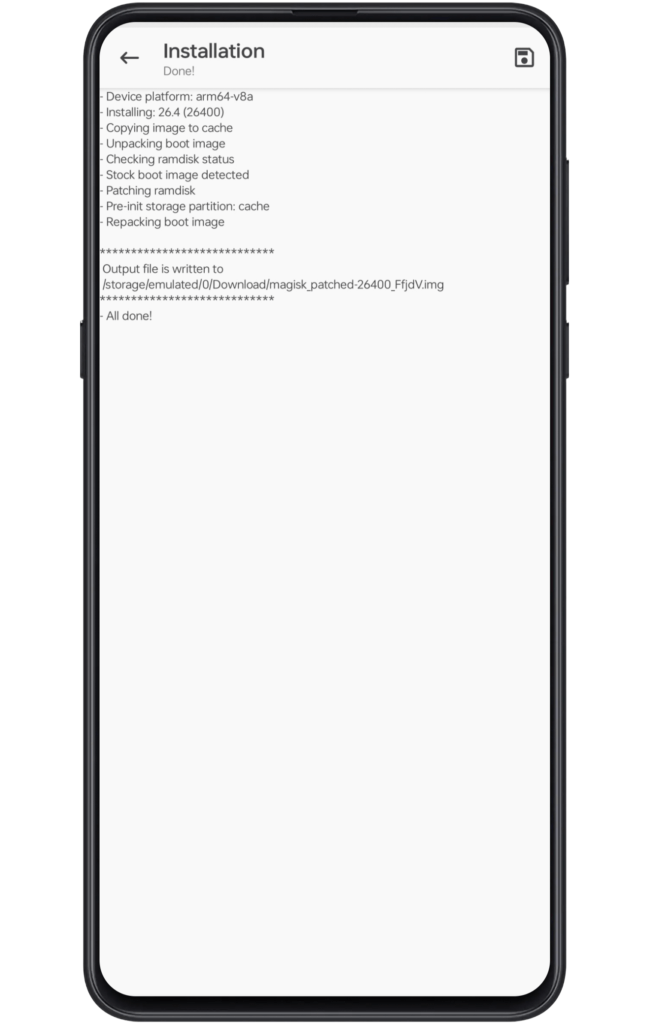
- Finally, transfer this patched_magisk file to your laptop/PC.
Note: Connect Your device to a PC or laptop using the original USB cable.
Step 5: Flash Patched Magisk File
Before you start this process, we suggest you download and install ADB/Fastboot drivers and SDK Android Platform Tools on your PC or laptop since will need them in the upcoming instructions. Aside from this, copy the patched_magisk file in the platform tools folder, while you can also rename this patched file according to your convenience.
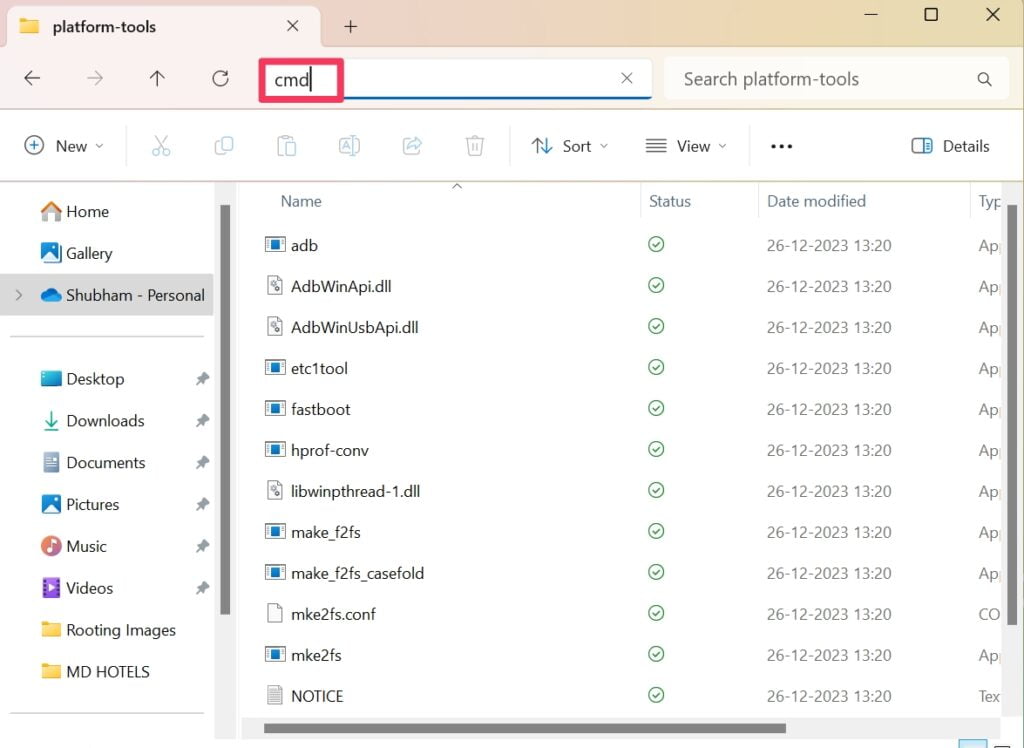
- Type “cmd” in the platform tools folder navigation bar.
- It will launch a common prompt on the screen.
- Now, enter “adb devices” to verify device connectivity.
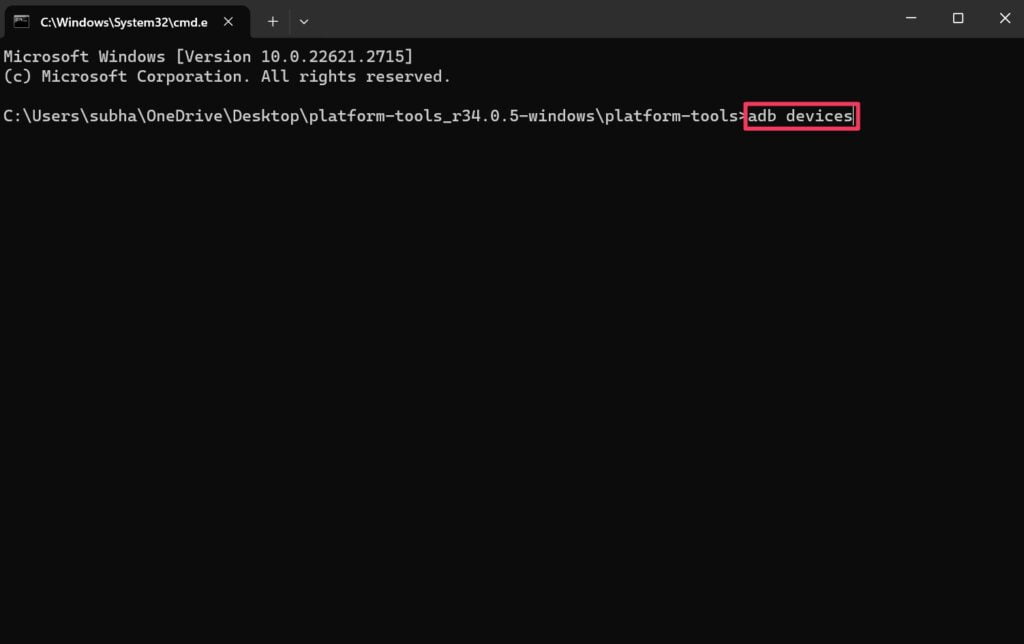
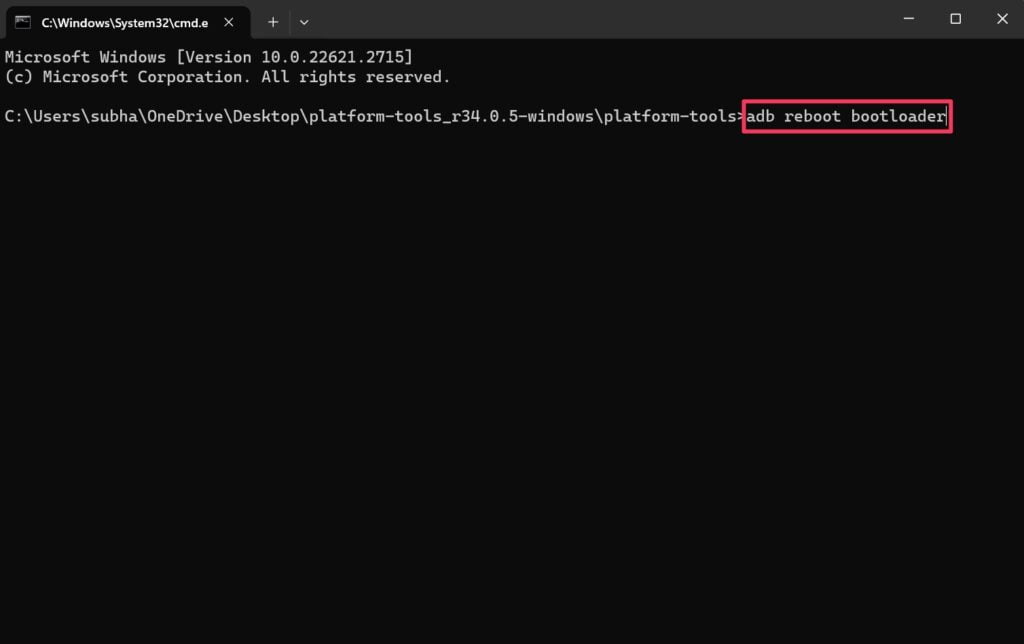
- Type “adb reboot bootloader” and hit enter to access fastboot mode.
Next, we have to apply fastboot commands. There are two combinations that the users can utilize to obtain the root permission so let’s have a look at them without any further ado.
Method #1: Temporary Root Access
Generally, when you are rooting your phone, you are applying system modification. But in a worst-case scenario, if the patched file is corrupted, the device will face bootloop issues. Yet, if you are using the subsequent method, you can reduce the risk to a certain extent.
Note: Download the fastboot drivers to use the upcoming commands with ease.
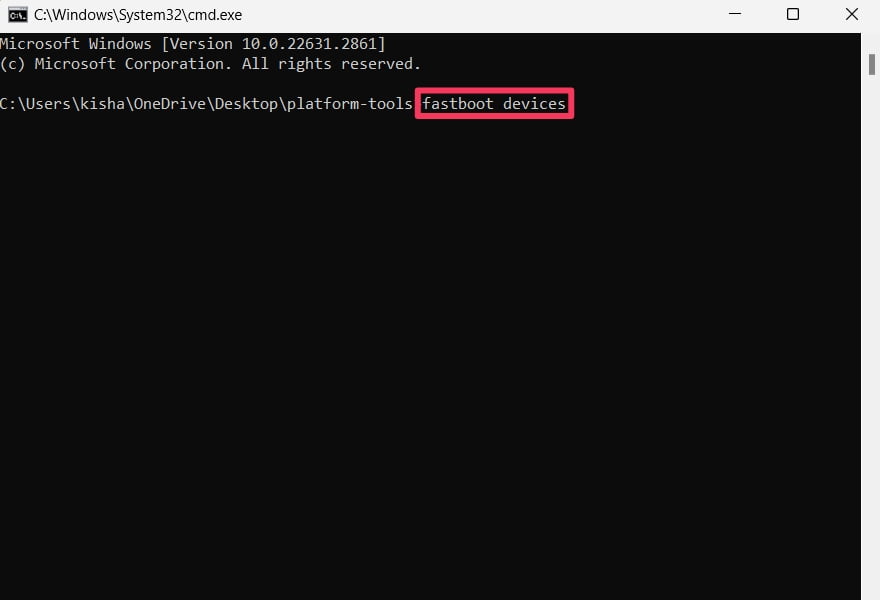
- Type “fastboot devices” to confirm the fastboot mode access.
- Now, Type “fastboot boot” and then write magisk_patched.img file name.
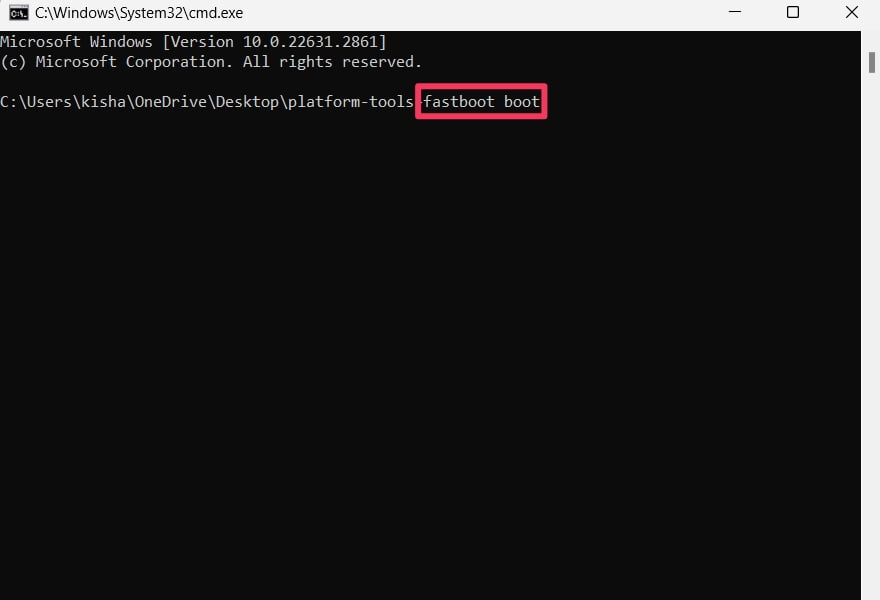
- Then, press Enter to confirm the magisk flashing command.
The phone will boot automatically, then you need to access the Magisk app. Now, click on the “Install” button and select “Direct Install” from the list. Then, press Let’s Go to initial the permanent root permission. With this, the phone will patch the boot img file, and lastly, you need to reboot the phone.
Method #2: Permanent Root Access
Getting root access directly comes with several risk factors. For instance, a corrupt patched file can cause a bootloop or even brick your device. However, if you are looking for a faster way to root your device, then you can opt for this method.
We assume that you have already completed the adb command, now let’s apply fastboot commands.
- Type “fastboot devices” to confirm fastboot access to your phone.
- Then, type “fastboot flash magisk_patched.img” and press enter.
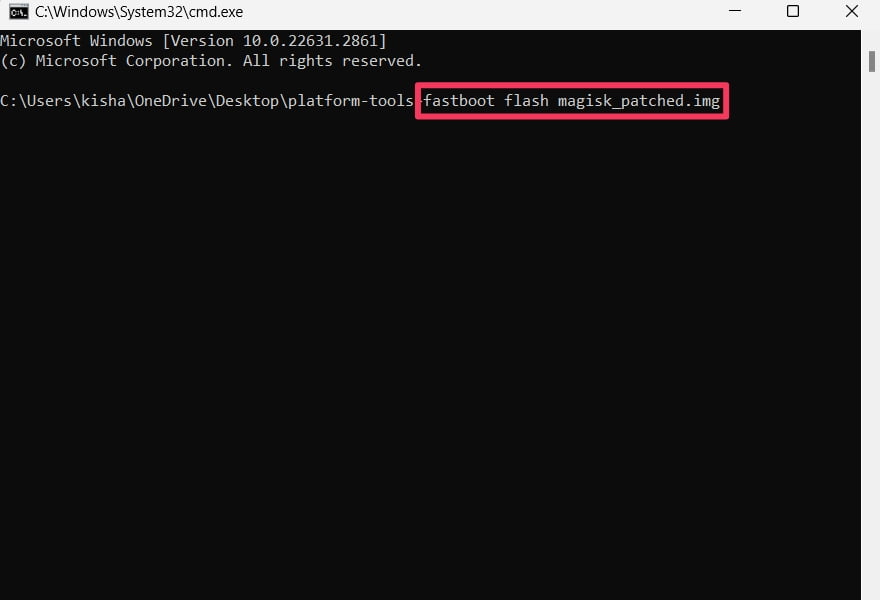
- Finally, reboot your phone and gain root permission!
Step 6: Confirm Root Redmi Note 13 Pro
Once you finish the magisk installation process, you will gain root permission over your device. In that case, it would be great to reconfirm those changes. To do so, you have to download the Root Checker app.
- Launch the Root Checker APK.
- Click on the “Verify Root” button.
- If you notice a Green tick, you successfully root Redmi Note 13 Pro.
How to Unroot Redmi Note 13 Pro?
If you want to completely remove the magisk software from your phone, it would be great to follow the subsequent instructions. Assuming that you unlock root access by magisk, let’s see the entire process.
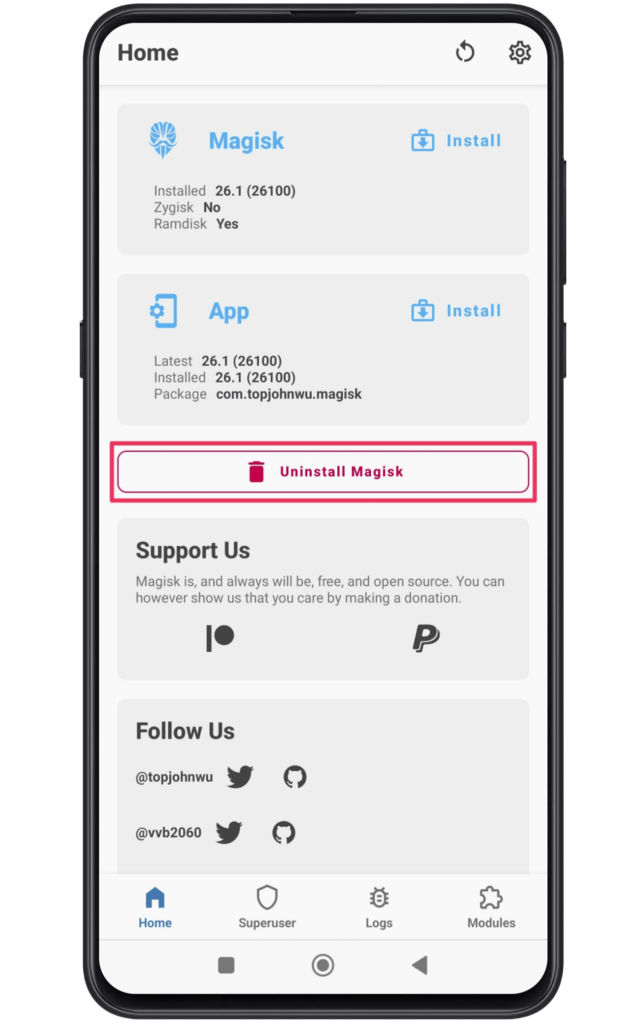
- First of all, launch the Magisk app on your device.
- Now, click on the Uninstall Magisk button that appears at the bottom.
- Next, you need to select the “Complete Uninstall” option from the pop-up.
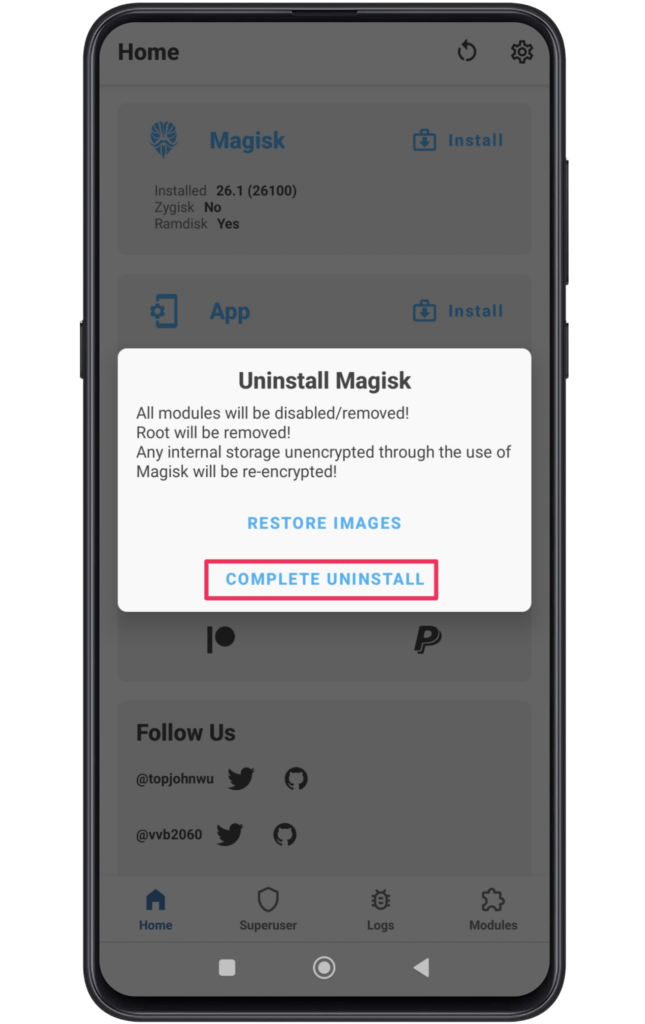
- Wait till the root access removal process is taking place.
After completing this step, you can also restore the firmware and relock the bootloader to use the phone just like before!
Final Thoughts:
Even if you are a newcomer or veteran when it comes to rooting Xiaomi Redmi devices, the above process navigates the important steps to gain those system privileges. With this, the users can modify the interface appearance according to their preferences.
Alongside this, the process will give new hope to users who want to add custom ROM, and other third-party software, that requires root permission. Yet, if you have any doubts or queries, comment in the subsequent part!