Do you wish to improve upon your Realme 5i experience? Maybe the solution you’re looking for is to root your device. Unlocking the full power of your gadget through rooting also gives you access to an abundance of customisation possibilities.
To provide a simple and hassle-free experience, we’ll take you step-by-step through the rooting procedure of your Realme 5i in this article.
How to Root Realme 5i?
In this post, we will cover two methods from which you can efficiently root Realme phone. It includes the standard TWRP recovery method, which allows users to flash the magisk zip. On the other hand, the second method involves installing the KingRoot.
In both processes, the users will obtain root access if they follow the steps properly. But before you start this journey, you should consider completing the requirements. It’s essential since a single mistake could lead to a huge problem.
Pre Requirements
Here are some of the core factors that you need to keep an eye on before diving into the rooting guide. With that said, let’s move toward the procedure.
- First and foremost, it’s recommended to fuel the phone to 80%.
- Download and install important tools and third-party resources.
- Make sure to take a complete backup of your Realme phone.
- Flash the correct version of the TWRP custom recovery.
- Get the latest version of the Magisk software for your phone.
Warning: Rooting OS isn’t responsible for hardware or software damage, getting root access could lead to a violation of warranty policies & even bricking the device. So, it’s suggested to learn the risk involved in the rooting and cautiously take further action!
Root Realme 5i using TWRP recovery
In this section, we will list down the entire process from which you can efficiently install TWRP custom recovery on your Realme 5i phone. Moreover, it will also help you acquire root privileges. With that said, let’s head toward the first instruction.
Step 1: Enable OEM Unlocking
Typically, the initial phase of rooting requires developer mode access. So, let’s understand the steps to gain access to this system settings without any further ado. Follow the given steps to understand everything precisely.
- First of all, launch the Settings app from the App drawer.
- Now, scroll down and tap on the About Phone option.
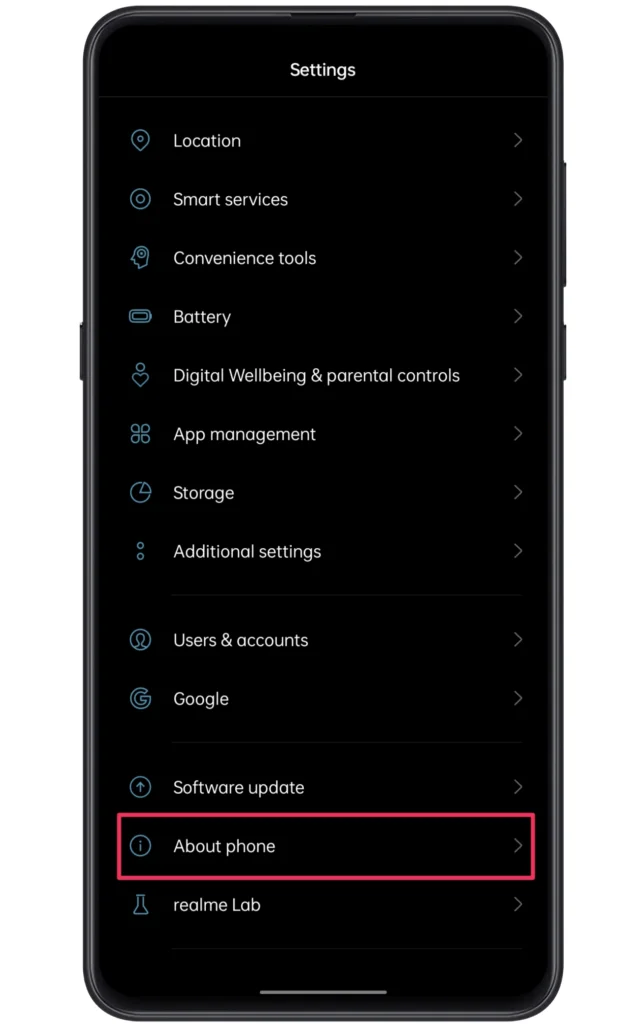
- Following this, you need to click on the “Version” section.
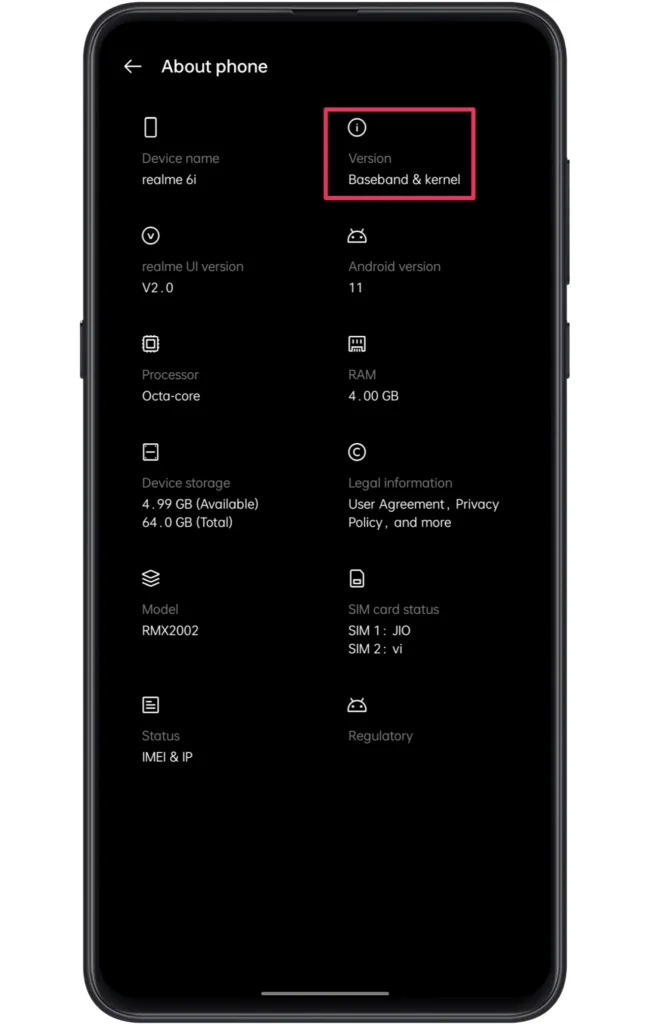
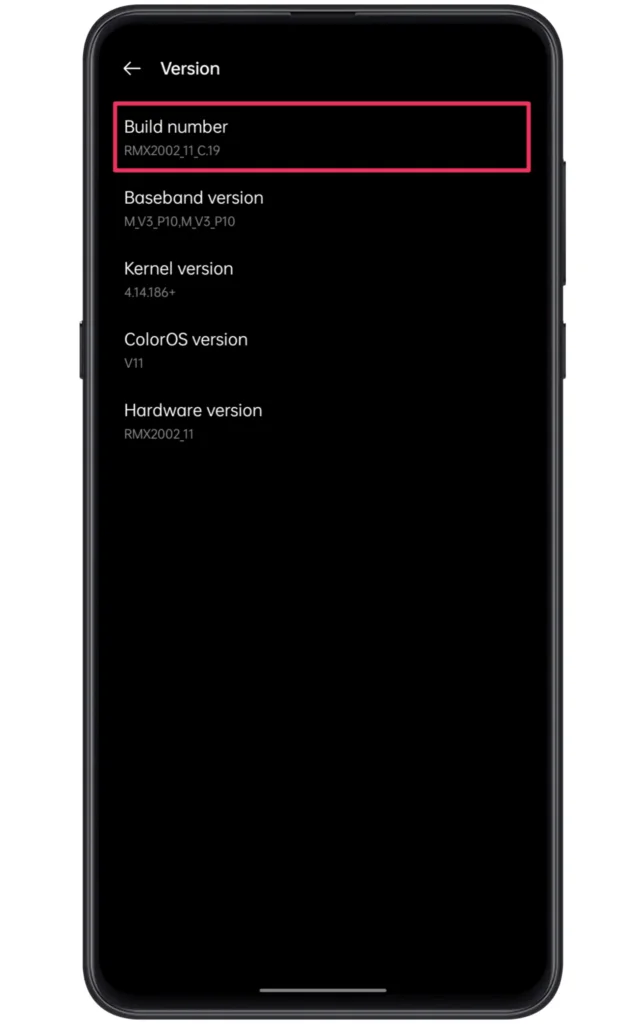
- Next, tap on the “Build Number” more than 6~7 times.
- Go back to the Settings menu and select “Additional settings”.
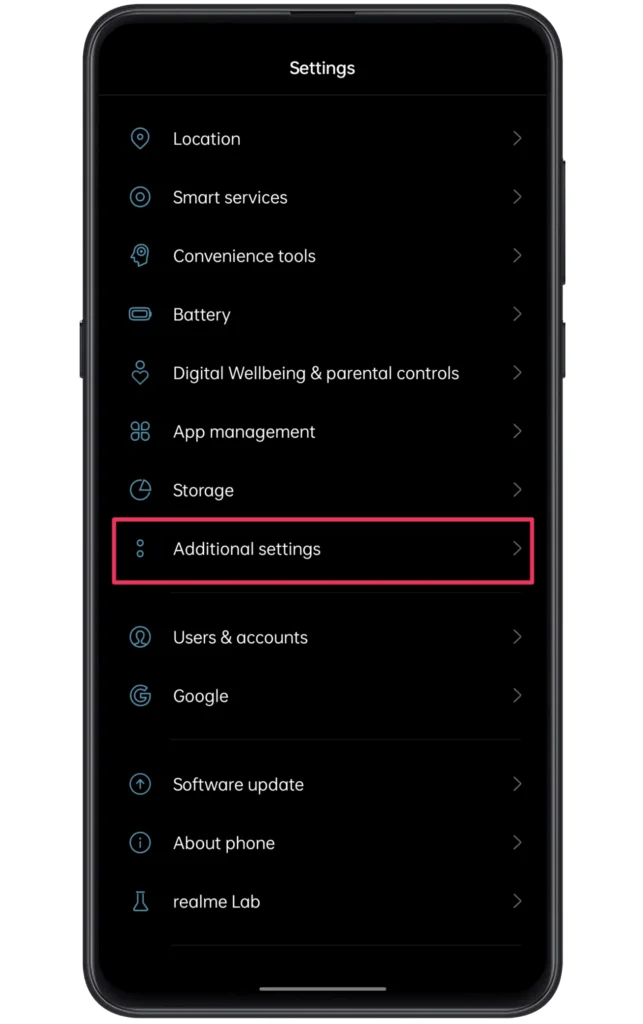
- Select Developer Options and allow OEM Unlocking.
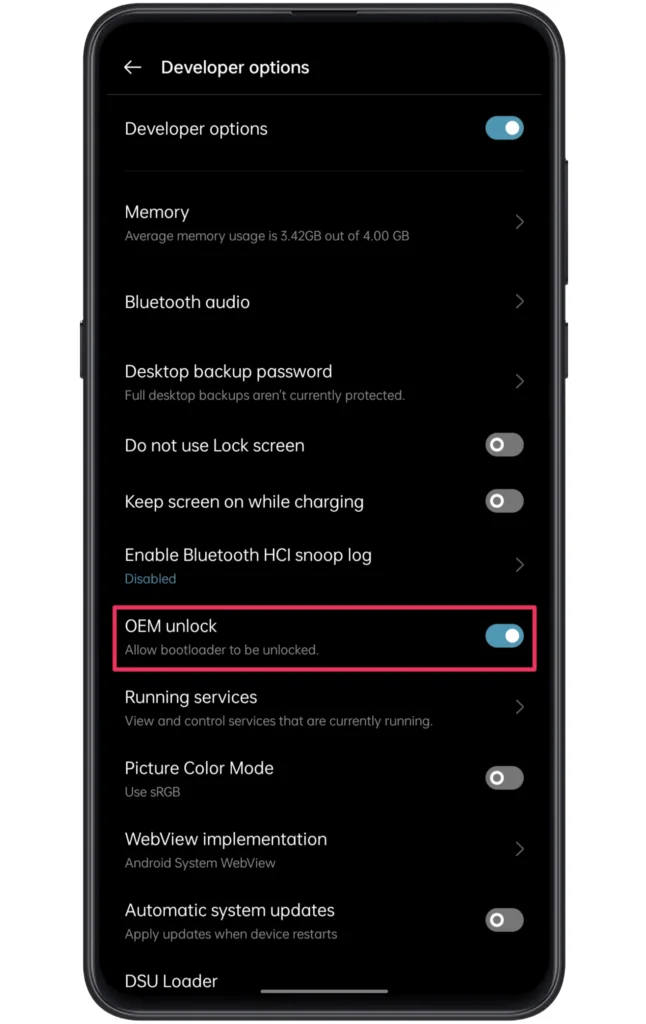
Note: You can also enable the USB debugging toggle from the developer mode since you need to connect your phone to the PC in the upcoming processes.
Step 2: Unlock the Bootloader Configuration
Once you have finished the developer mode steps, the readers need to acquire bootloader access. Generally, the Realme devices come with unlockable bootloaders. For this, all you need to do is run some fastboot commands on your computer/laptop.
Although, it’s a tedious process if you are rooting your device for the first timers. Yet, it’s a piece of cake if you follow our how-to unlock bootloader on any Android phone guide. It will navigate you through all of the ins and outs of the whole process.
Note: In general, if you unlock the bootloader configuration on the Realme phones, it will erase internal storage data. Therefore, creating a backup in advance would be great.
Step 3: Install TWRP on Realme phone
After you have completed the bootloader unlocking process, the next thing that you need to work on would be installing TWRP recovery. Instead of stock recovery, using a custom one is necessary as it will help you flash third-party modification of the firmware.
If you are interested in getting the authentic version, we suggest you visit TWRP’s official page and get a custom recovery for your Realme device. On the other hand, you can check out our TWRP installation guide to understand the whole process.
Note: To flash custom recovery, you will need either a PC/laptop or a secondary phone, so make sure to get one before starting the TWRP installation steps.
Step 4: Flash Magisk Zip File
In this section, you will understand the whole process of rooting your Realme phone using the magisk software. Magisk allows users to hassle-free root their devices without applying modification to the system kernel files. Therefore, it becomes the safest method. Now, let’s have a look at the steps.
- Download the latest version of the Magisk zip.
- Boot the device into the TWRP recovery mode.
- Inside the TWRP recovery, tap on the Install button.
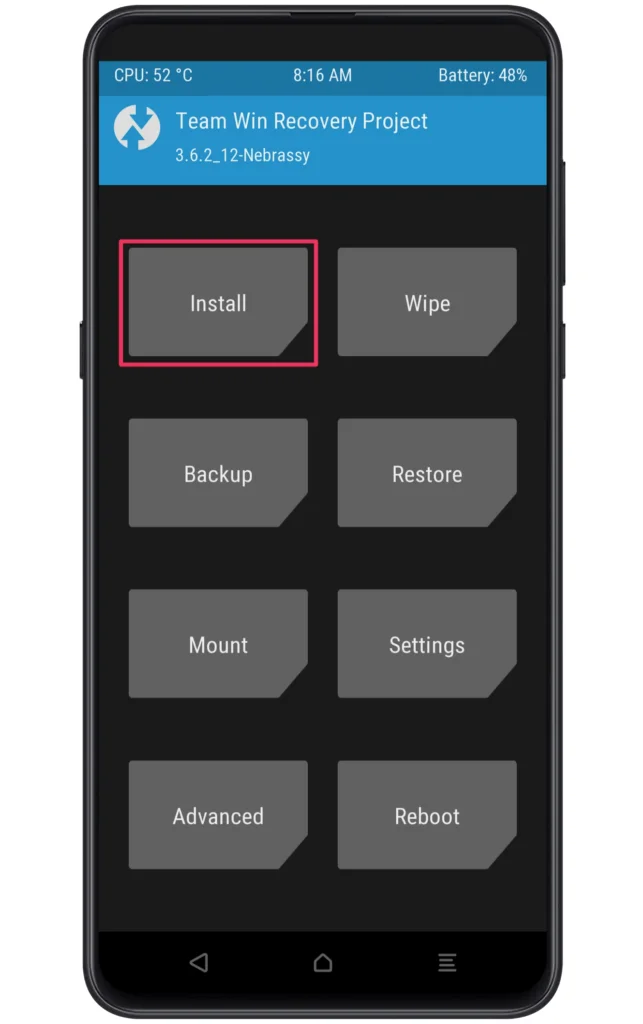
- Go through the Magisk zip location.
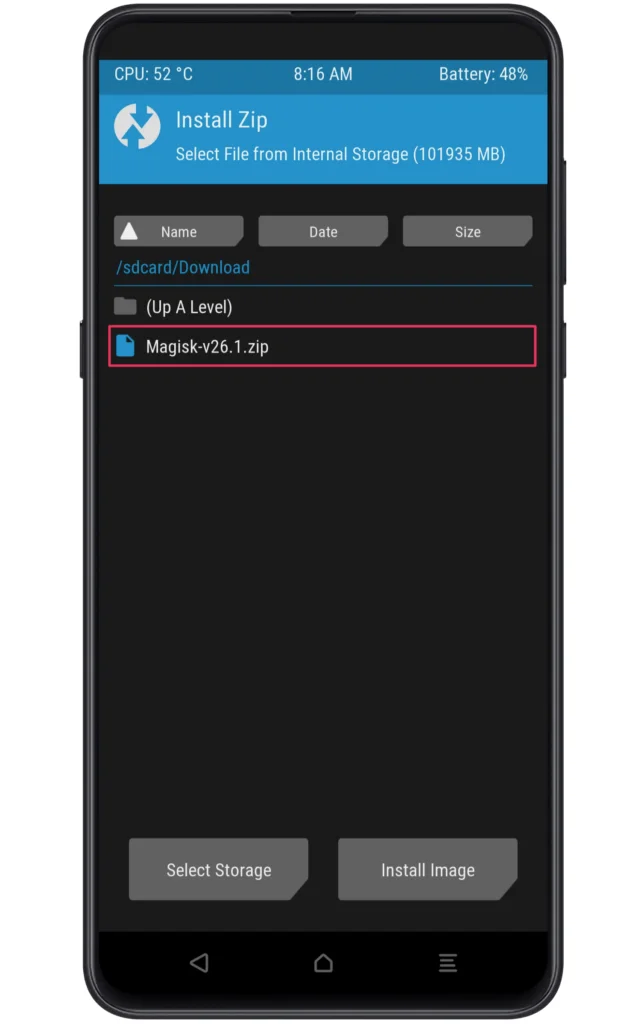
- Select the file and swipe right to confirm flashing.
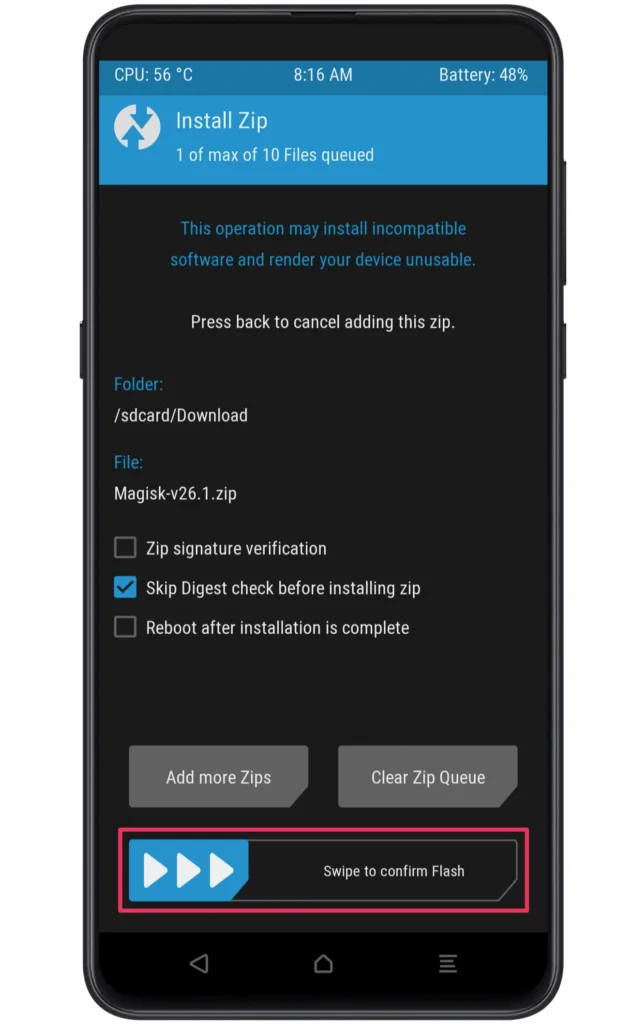
- Once the flashing ends, reboot your device.
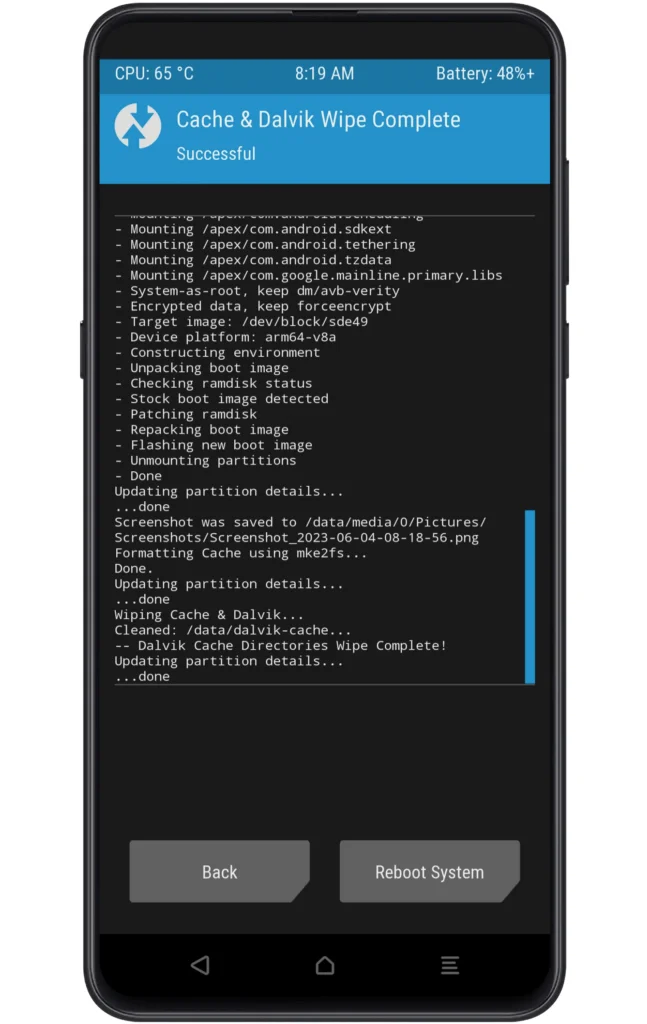
- Finally, install the magisk app and enjoy flashing custom ROMs.
Step 5: Unroot Realme 5i using Magisk
From the above section, you will install the magisk software on your phone. But if you want to remove the root permission from your device, then follow the subsequent guide to easily unroot your Realme phone. Here are the steps that you need to follow!
- Launch the Magisk App on your phone.
- Click on the Uninstall Magisk option.
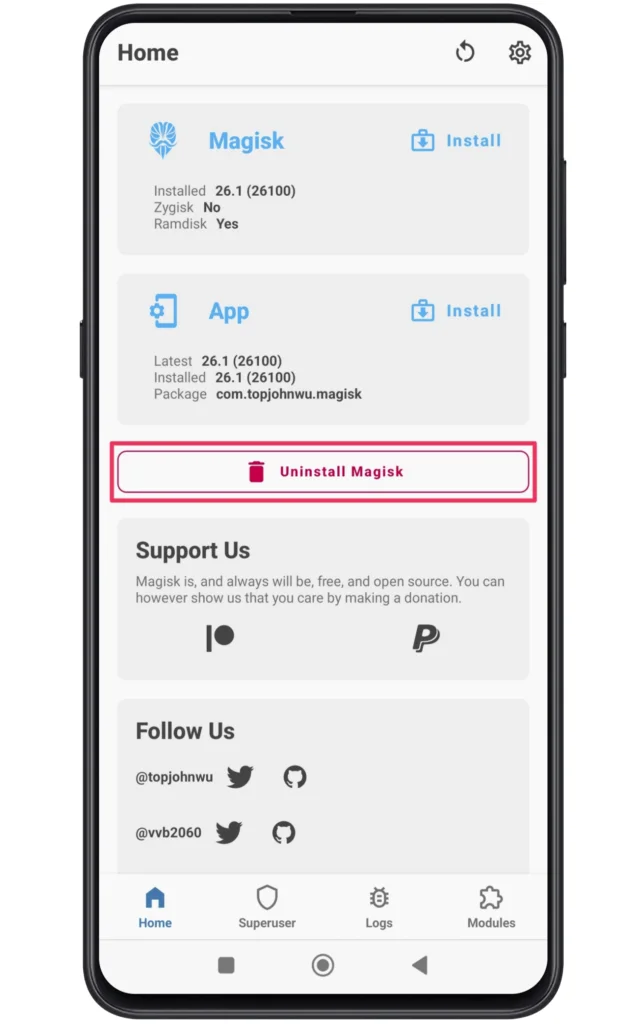
- Select the “Complete Uninstall” choice.
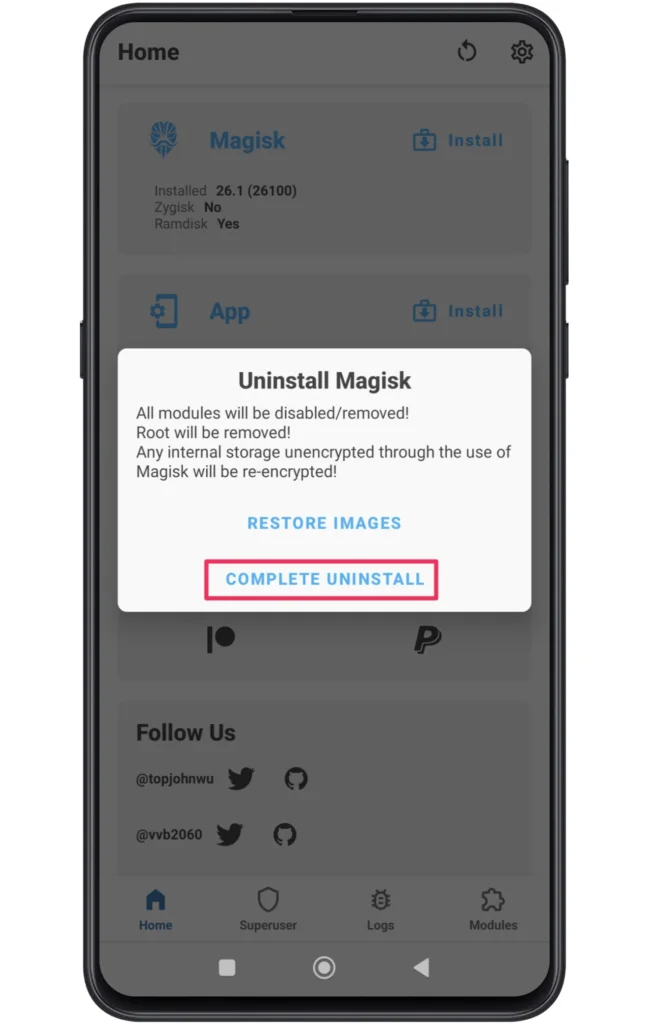
- The phone will go through multiple reboots.
- Once done, you will successfully unroot Realme 5i.
Note: This process is only applicable if you have rooted your phone via the magisk zip or magisk patched file.
Root Realme 5i Using KingRoot
Apart from using the standard recovery method to flash the magisk software, you can also apply other rooting procedures according to your desire. Several tools instantly provide root privileges, one of them is KingRoot. So, let’s see the installation process below!
- First, download and install the KingRoot APK.
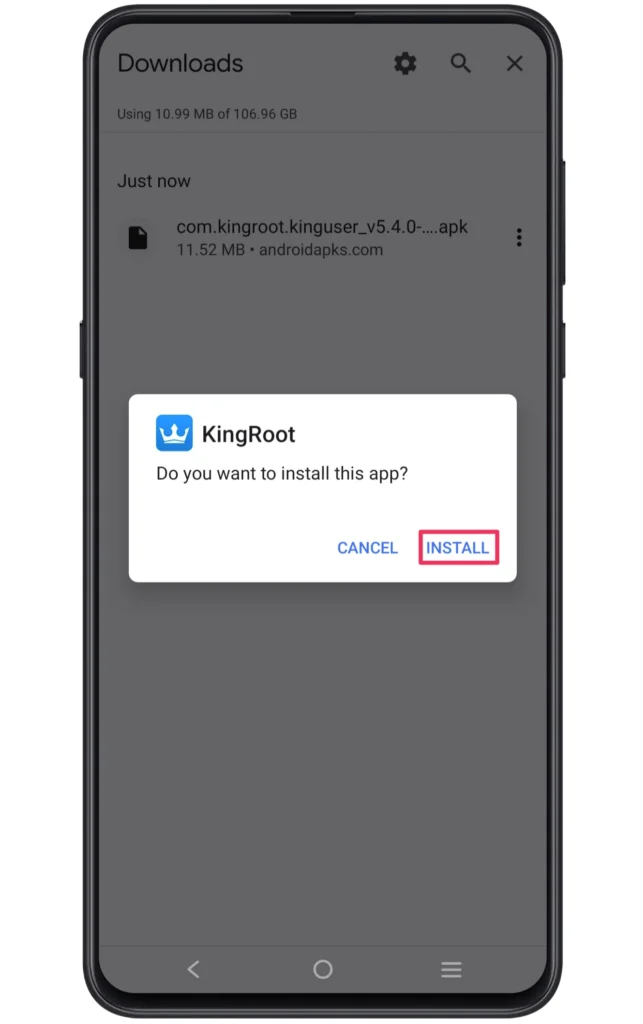
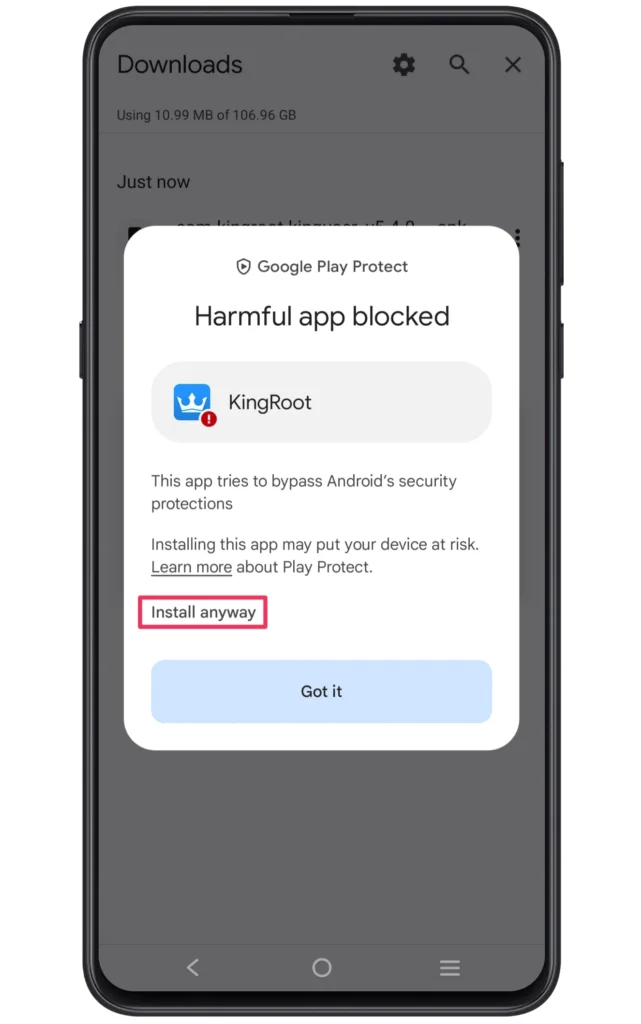
- Enable the unknown source setting to install this app.
- Tap on “Install Anway” if you see a harmful app blocked pop-up.
- Now, click on the “TRY IT” button to check root access.

- Next, the device will go through multiple booting processes.
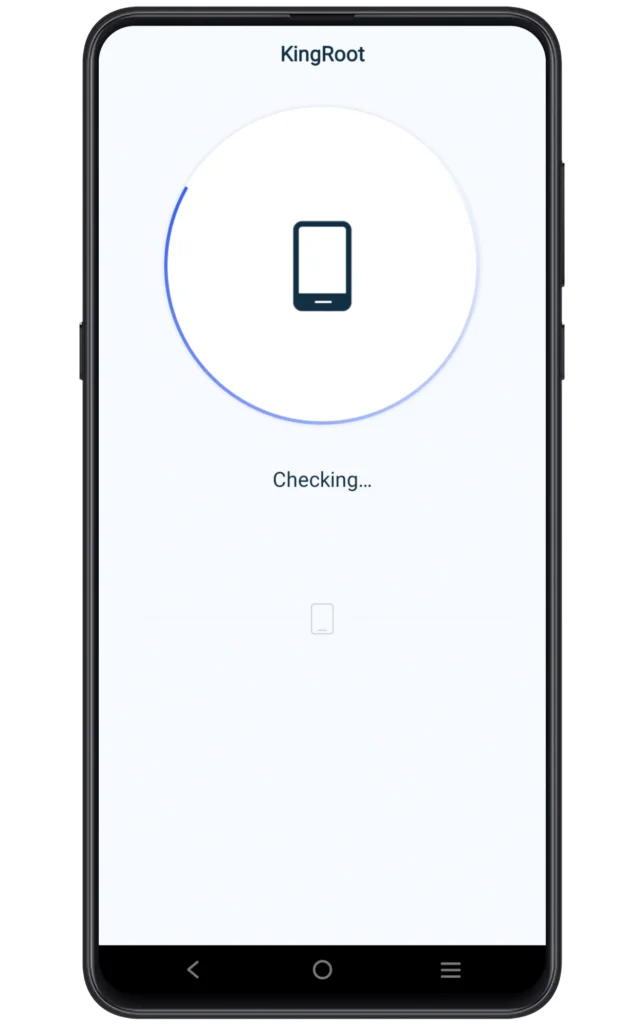
- Finally, you will attain root permission on your phone.
Note: Rooting your smartphone through the KingRoot can cause unstable performance and other serious issues. However, the success rate of this process is low as compared to the TWRP recovery mode. So download the app at your own risk!
How to Confirm Realme 5i Root Access?
From the above method, you will gain root access hassle-free. But if you have some doubts and want to reconfirm the root permission, then it’s suggested to download a third party like the root checker app to verify those changes.
Here are the steps to use this app!
- Download and install the Root Checker APK.
- Launch the Root Checker app with no further ado.
- Click on the Agree button to appear on the screen.
- Finally, check the root status of your phone.
Related Posts
Best wishes! Your Realme 5i has been successfully rooted, allowing you to utilise all of its features. You may now install strong root-only apps, personalise every element of your device, and tweak performance to your liking by following the instructions in this guide.
But, it’s crucial to approach cautiously and be informed of the dangers associated with rooting, including the possibility of losing warranties and security flaws.
However, rooting can be a game-changer for enthusiasts and experienced users, offering unmatched flexibility and control over your device.
Savour discovering all of the possibilities that rooting your Realme 5i opens up!